I recently started my journey with macOS internals. This is probably one of the most exciting topics I learned so far. However, during this journey, I realized that connecting these concepts with the context of desktop applications was hard. Then, I decided to approach it from a practical point of view. For this first series, we will play with launchd.
In the previous post, we discussed building a basic macOS agent with launchd. But we are still far from how a software engineer could interact with and do with a real-world application. In this post, we will try to contextualize the usage of agents in a GUI macOS application.
By the end of this post, you should be able to:
- Create an XPC service from Xcode with Swift
- Establish a connection between a macOS application and your service
- Understand the difference between LaunchAgent and XPCService
Setup
For this workshop, we will use Xcode. Let's create the Xcode project:
1 - To create the macOS application, open Xcode; a modal will appear, then:
- Click on "macOS"
- Click on "App"
- Fill in a product name (e.g. "DemoApp"),
- Click on "Next".
2 - Now we have to create our service
- Click on File > New > Target
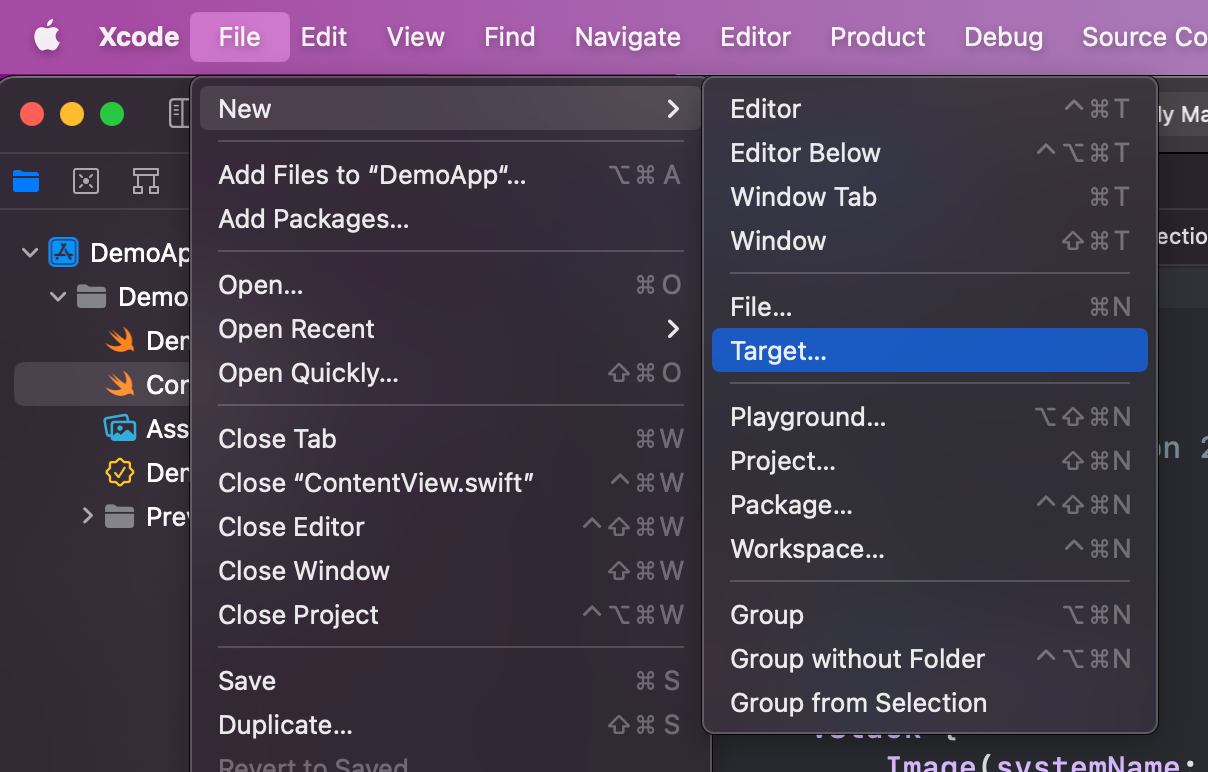
- Select "XPC Service"
- Fill in a product name (e.g. DemoService)
- Click on "Finish"
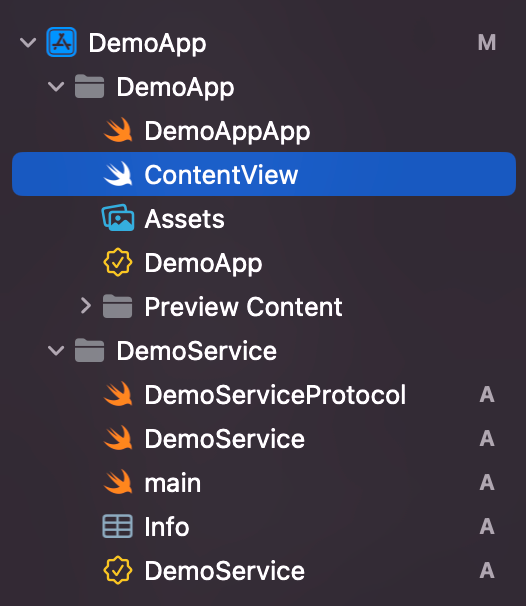
3 - You should end with the following structure
💡In the previous post, we talked about "agents", and here Xcode uses "services". What is the difference between both? LaunchAgents are aligned with the traditional concept of daemons or background processes and run on behalf of the currently logged-in user. On their end, XPCServices provides services to a single application. They are typically used to divide an application into smaller parts.
Note that both are managed by launchd.
Define a protocol
You will see a DemoServiceProtocol file if you take a deeper look at the XPC service folder structure. This file determines the API that the service will expose.
A quick reminder from Swift documentation about protocol:
A protocol defines a blueprint of methods, properties, and other requirements that suit a particular task or piece of functionality.
By default, Xcode generates this basic Protocol:
// Basic DemoServiceProtocol generated by Xcode

import Foundation

@objc protocol DemoServiceProtocol {
    func uppercase(string: String, with reply: @escaping (String) -> Void)
}
For the sake of this post, we will keep it like that. We will add a new close method:
// Adding a close method to the DemoServiceProtocol

import Foundation

@objc protocol DemoServiceProtocol {
    func uppercase(string: String, with reply: @escaping (String) -> Void)
    func close()
}💡Why do we have a @objc decorator here? The @objc attribute in this Swift protocol ensures compatibility with NSXPCInterface which is a class from the Foundation framework (based on Objective-C). This API will let us close the service programmatically.
Now, if you open the DemoService file, which should contain the implementation for the protocol we just defined, you will see this error:
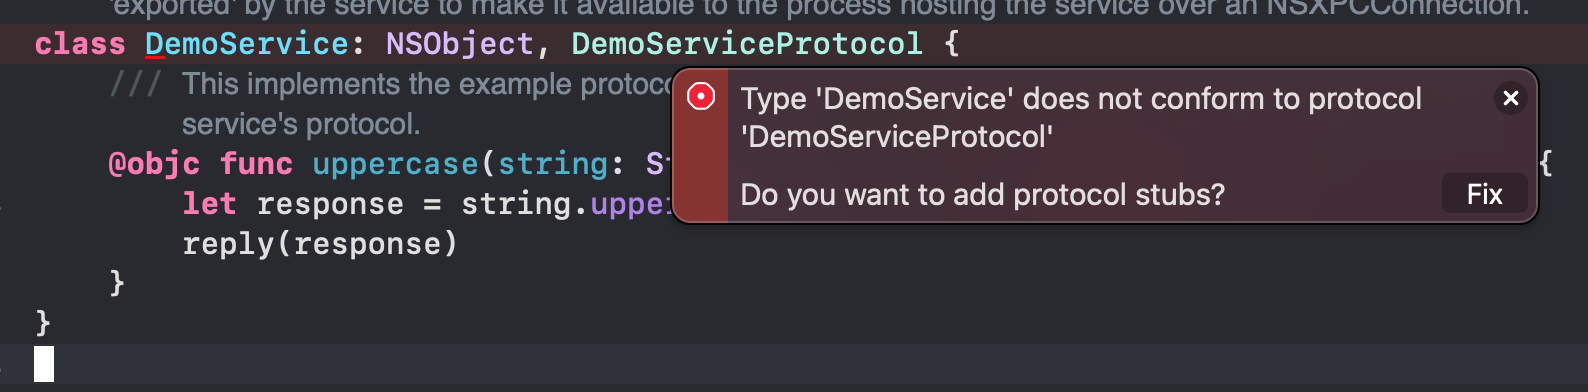
That is fine, as we added a close method in the protocol that we have to implement:
// DemoService class that conform to DemoServiceProtocol

class DemoService: NSObject, DemoServiceProtocol {
    @objc func uppercase(string: String, with reply: @escaping (String) -> Void) {
        let response = string.uppercased()
        reply(response)
    }

    func close() {
        exit(0)
    }
}
🫡 I will explain later why I added this method.
Accept incoming connection
Xcode automatically generates this code for accepting incoming requests in the main.swift file, but let's untangle it.
NSXPCListenerDelegate protocol
The first part of the file is about the implementation of a ServiceDelegate class that conforms to the NSXPCListenerDelegate.
// ServiceDelegateServiceDelegate conforms to NSXPCListenerDelegate.

class ServiceDelegate: NSObject, NSXPCListenerDelegate {
// ...
}
The NSXPCListenerDelegate has one single interface:
// Definition of NSXPCListenerDelegate protocol

public protocol NSXPCListenerDelegate : NSObjectProtocol {
    // Accept or reject a new connection to the listener. This is a good
    // time to set up properties on the new connection, like its exported
    // object and interfaces. If a value of NO is returned, the connection
    // object will be invalidated after this method returns. Be sure to resume
    // the new connection and return YES when you are finished configuring it
    // and are ready to receive messages. You may delay resuming the
    // connection if you wish, but still return YES from this method if you
    // want the connection to be accepted.
    @available(macOS 10.8, *)
    optional func listener(_ listener: NSXPCListener,
                           shouldAcceptNewConnection newConnection: NSXPCConnection
                           ) -> Bool
}
The two things we have to hold here:
- This is the right place to set up a new interface and object: that is handy for us as we have to bind our
DemoServiceProtocolprotocol andDemoServiceclass. - Return
trueand resume the connection using.resume()fromNSXPCConectionobject.
Now, let's take a look at the generated code...
Conform to NSXPCListenerDelegate protocol
Let's go back to the main.swfit file:
// Configure the connection.

newConnection.exportedInterface = NSXPCInterface(
    with: XPCDemoServiceProtocol.self)

let exportedObject = XPCDemoService()
newConnection.exportedObject = exportedObject
In this part of the code, we simply:
- Set the interface aka
XPCDemoServiceProtocol - Set the object that matches the interface, aka
XPCDemoService
Now, let's inspect the second part of the code:
// Resume the connection

newConnection.resume()

return true
As read on the documentation, this is essential because until you call the resume method, the connection won't process any messages sent to it. Resuming the connection tells the XPC infrastructure that your service is ready to handle requests.
⚠️ This way of accepting incoming requests is unsafe, but we could explore a potential solution in another post.
Our agent is now ready to receive requests and perform jobs. We will now learn how to send requests to this service in our application...
Set up the client-side XPC connection
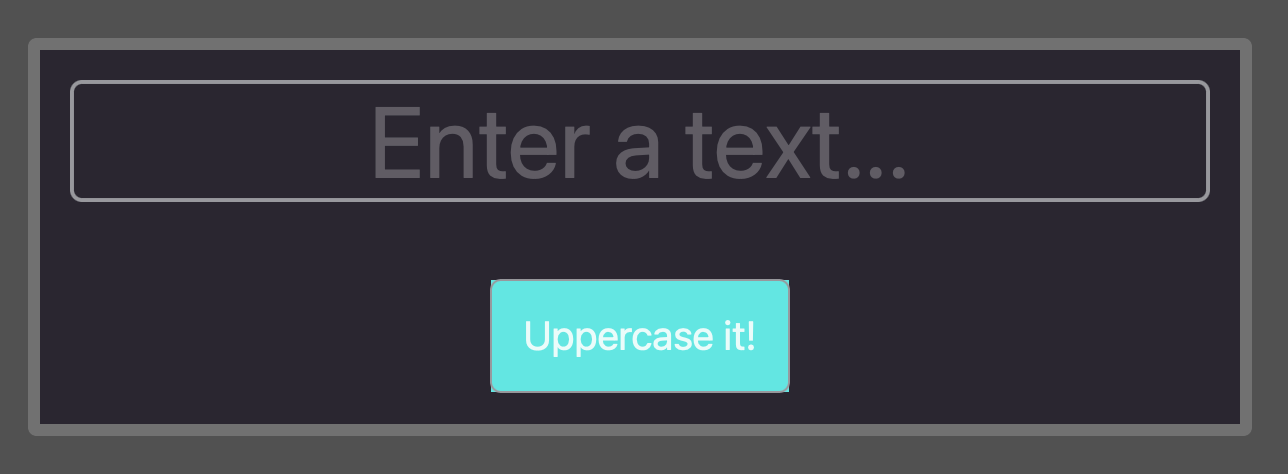
Before jumping into the XPC client, let's add a bit of UI to this application.
UI
Open the ContentView.swift file and paste this content
// SwiftUI code for the macOS application

struct ContentView: View {
    @State private var inputText: String = ""

    var body: some View {
        VStack {

            TextField("Enter a text...", text: $inputText)
                .textFieldStyle(.plain)
                .font(.system(size: 50))
                .background(Color("Accent")s
                .multilineTextAlignment(.center)
                .overlay(
                    RoundedRectangle(cornerRadius: 5)
                        .stroke(.gray, lineWidth: 3)
                )
                .padding()
            HStack {
                Spacer()
                Button("Uppercase it!") {
                  // This is where we will call the XPC service
                }
                .buttonStyle(.plain)
                .font(.system(size: 20))
                .padding()
                .background(.mint)
                .overlay(
                    RoundedRectangle(cornerRadius: 5)
                        .stroke(.gray, lineWidth: 1)
                        .foregroundColor(.red)
                )
                .padding()

                Spacer()

                // TODO: display uppercase result
            }
        }
    }
}
You can also tweak the content of DemoApp.swift file:
// Fix resizability of the macOS application

struct DemoAppApp: App {
    var body: some Scene {
        WindowGroup {
            ContentView()
                .frame(minWidth:  500, // here
                       maxWidth:  500,
                       minHeight: 300,
                       maxHeight: 300)
        }
        .windowStyle(.hiddenTitleBar) // here
        .windowResizability(.contentSize) // here
    }
}
I aslo wrote this post about how to constraint resizability of the macOS application.
Wait! We have the design, but it is still empty. How could I consume the DemoServiceProtocol from here?
XPC Client class
Now, let's create a new file called XPCClient.swift and add an XPCClientProtcol protocol:
// Swift protocol for XPCClient

import Foundation

protocol XPCClientProtocol {
    func uppercase(for inputString: String, completion: @escaping (String) -> Void)
    func close()
}
This protocol is necessary for a reason I will evoke later.
Now, let me write down the XPCClient class:
// init and deinit method of the XPCClient class

class XPCClient: XPCClientProtocol {
    private let connection: NSXPCConnection

    init() {
        connection = NSXPCConnection(serviceName: "com.tonygo.DemoService")
        connection.remoteObjectInterface = NSXPCInterface(with: DemoServiceProtocol.self)
        connection.resume()
    }

    deinit {
        connection.invalidate()
    }
}
In this code, we declare a private NSXPCConnection object:
This class is the primary means of creating and configuring the communication mechanism between two processes.
To establish a connection, we have to:
- Instantiate the
NSXPCConnectionobject withinit(serviceName: String)
// How to instantiate a NSXPCConnection

connection = NSXPCConnection(serviceName: "com.tonygo.DemoService")- Define the
NSXPCInterfaceobject that describes the protocol for the object. Setting this property tells theNSXPCConnectionobject what kind of messages or method calls the service can respond to.
// Set a remote object to the NSXPCConnection

connection.remoteObjectInterface = NSXPCInterface(with: DemoServiceProtocol.self)- Starts or resumes handling of messages on a connection with
resume()
connection.resume()
You probably observed the deinit method, within the class and as a reminder:
Deinitializers are called automatically, just before instance deallocation takes place.
This is perfect to do some additional cleanup, like calling invalidate method:
// Invalidate NSXPCConnection after XPCClient deallocation.

deinit {
  connection.invalidate()
}
After a connection is invalidated, no more messages may be sent or received.
By doing this, you should see this error highlighted by XCode:

This is because DemoServiceProtocol is a translation unit that is only present in the DemoService project but not in the DemoApp one. Let's fix this by sharing the translation unit with the DemoApp target:
![]()
Add business logic
Having an established connection is a requirement to be able to consume our remote object. Now, let's expose a uppercase method that we will use in our SwiftUI view.
Still in the XPCClient file, add a uppercase method:
// Adding a uppercase method, the XPCClient

func uppercase(for inputString: String, completion: @escaping (String) -> Void) {
  let service = connection.remoteObjectProxyWithErrorHandler { error in
    print("Error during remote connection: ", error)
  } as! DemoServiceProtocol

  service.uppercase(string: inputString, with: { (uppercasedString) in
    completion(uppercasedString)
  })
}
The proxy object created by remoteObjectProxyWithErrorHandler is an intermediary that allows your application to communicate with the remote XPC service as if it were directly calling methods on an object in its process.
Then, we could consume our interface object by calling the service.uppercase method.
Now, we could expose a close method:
// Adding a close method, the XPCClient

func close() {
  let service = connection.remoteObjectProxyWithErrorHandler { error in
    print("Error during remote connection: ", error)
  } as! DemoServiceProtocol

  service.close()
}
But we duplicated a line; let's try to refactorize this:
// Final implementation of XPCClient class

class XPCClient: XPCClientProtocol {
    private let connection: NSXPCConnection
    private let service: DemoServiceProtocol

    init() {
        connection = NSXPCConnection(serviceName: "com.tonygo.DemoService")
        connection.remoteObjectInterface = NSXPCInterface(with:
                                                            DemoServiceProtocol.self)
        connection.resume()

        service = connection.remoteObjectProxyWithErrorHandler { error in
            print("Error during remote connection: ", error)
        } as! DemoServiceProtocol

    }

    deinit {
        connection.invalidate()
    }

    func uppercase(for inputString: String, completion: @escaping (String) -> Void) {
        service.uppercase(string: inputString, with: { (uppercasedString) in
            completion(uppercasedString)
        })
    }

    func close() {
        service.close()
    }
}
We are now ready to plug it back into the UI.
Build the application
Before running the application, we should consume our XPCClient in our ContentView.
Update the UI
First, let's change the App class.
// Create an instance of XPCClient and pass it to the ContentView.

struct DemoAppApp: App {
    let xpcClient = XPCClient(); // #1
    var body: some Scene {
        WindowGroup {
            ContentView(xpcClient: xpcClient)
                .frame(minWidth: 500, maxWidth: 500, minHeight: 300, maxHeight: 300)
                .onReceive(NotificationCenter.default.publisher( // #2
                    for: NSApplication.willTerminateNotification)) { _ in
                    // MARK: this is necessary if you want to avoid zombies
                    // in preview mode
                    xpcClient.close()
                }
        }
        .windowStyle(.hiddenTitleBar)
        .windowResizability(.contentSize)
    }
}- #1 - Instantiation of the
XPCClientclass we freshly created - #2 - Manually close the
DemoServiceservice
👻 I used the close method to force the xpcClient created on the second line to exit. Otherwise, you will experience zombies using Preview.
ContentViewview has to be updated:
// Adding a state to store the result, call the uppercase method
// from XPCClient and display the result.

struct ContentView: View {
    @State private var inputText: String = ""
    @State private var upperText: String = "" // #1

    let xpcClient: XPCClientProtocol // #2

    var body: some View {
        VStack {

            TextField("Enter a text...", text: $inputText)
                .textFieldStyle(.plain)
                .font(.system(size: 50))
                .background(Color("Accent"))
                .multilineTextAlignment(.center)
                .overlay(
                    RoundedRectangle(cornerRadius: 5)
                        .stroke(.gray, lineWidth: 2)
                )
                .padding()
            HStack {
                Spacer()
                Button("Uppercase it!") {
                    xpcClient.uppercase(for: inputText) { result in // #3
                        DispatchQueue.main.async {
                            upperText = result
                        }
                    }
                }
                .buttonStyle(.plain)
                .font(.system(size: 20))
                .padding()
                .background(.mint)
                .overlay(
                    RoundedRectangle(cornerRadius: 5)
                        .stroke(.gray, lineWidth: 1)
                        .foregroundColor(.red)
                )
                .padding()

                Spacer()

                if upperText.count > 0 { // #4
                    HStack {
                        Label("Result:", systemImage: "bolt.fill")
                            .font(.system(size: 30))
                            .labelStyle(.iconOnly)
                        Text(upperText)
                            .font(.system(size: 30))
                            .padding()
                    }
                    Spacer()
                }
            }
        }
    }
}- #1 - Add a state here to store the result
- #2 - Declare the
xpcClientas class parameter - #3 - Use the
uppercasemethod - #4 - Display the result
You'll have noticed that we set the result in DispatchQueue.main.async closure, ensuring that the UI update will happen on the main thread.
The last thing we have to do before testing is to fix this error:
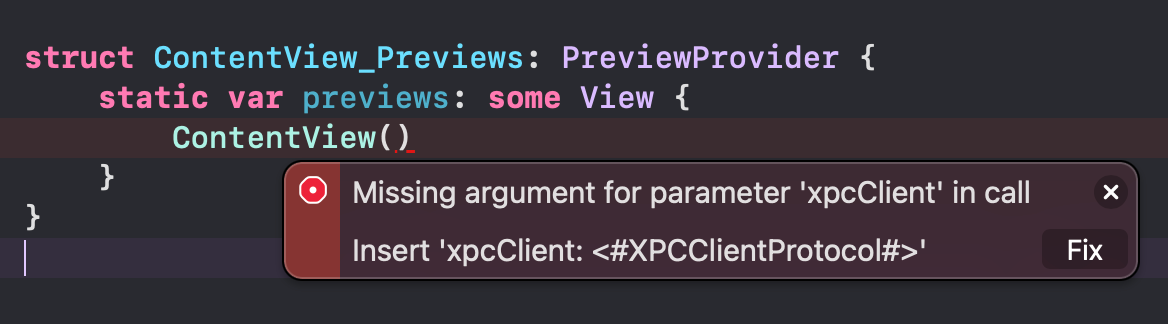 Xcode highlights that the xpcClient parameter is required. If you want to use Xcode Preview, you must fix this. I propose you to create a mocked class.
// Adding a mocked class to the Preview

class MockedXPCCLient: XPCClientProtocol {
    func uppercase(for inputString: String, completion: @escaping (String) -> Void) {}

    func close() {}
}

struct ContentView_Previews: PreviewProvider {
    static var previews: some View {
        let mockedXPC = MockedXPCCLient()
        ContentView(xpcClient: mockedXPC)
    }
}
😜You are free to put the mocked class in the XPCClient file.
Manual testing
If you already did a preview within Xcode or tried to build the app before all these steps, you could see a few zombies. Aiming to check it, run this command:
# Grep **launchd** services

launchctl list | grep DemoApp
If you see a bunch of items like this:
89005	0	application.com.tonygo.DemoApp.134681508.135243372.0EF62977-0AFC-4F6F-A97C-F2BC594FFAD8
89007	0	application.com.tonygo.DemoApp.134681508.135243372.321A0DD7-78A2-4047-BC80-FFFA61D0D5C8
12830	0	application.com.tonygo.DemoApp.134681508.134686262.F095F3EB-A4E6-4ACD-A0C4-31CD8DD40B76
88885	0	application.com.tonygo.DemoApp.134681508.135243013.1CE7E235-F86C-46AF-A4C3-5BD0332B688C
You are good to delete them manually.
kill 89005 89007 12830 88885
But after this, you should not experience Zombies anymore (as far as I have experienced)
Now it is time to press the little build button on the top left of Xcode:
Now if you use launchctl list again:
➜  ~ launchctl list | grep DemoApp

10635	0	application.com.tonygo.DemoApp.135241344.135277621.E7951696-E41D-402E-A858-C3EEBB45102D
But If you close your application:
➜ ~ launchctl list | grep DemoApp
No more DemoApp services.
Next steps
We built a basic macOS application that interacts directly with an XPC service in Xcode. But we could move forward in the following posts:
- How did Xcode launch this service? and How much could we interact with this XPC service outside of Xcode?
- How do we verify incoming connections for safety purposes?
Let me know which one you would like to see first.